Proper Slope For Drainage For Urethane and Epoxy Floors
Slope to Drains - renovation
Installing New Drains for Food and Beverage Processing
New drains may be required due to plant relocation into a new facility, or to meet sanitary requirements for their existing facility. If the existing floor is flat, sloping the floor must also be addressed during the construction design phase.
The three most common new drain issues that must be addressed include:
- New drains need to be set at the correct elevation/height.
- New floor toppings need to interface properly with the new drains.
- Puddling around the drains must be prevented.
-

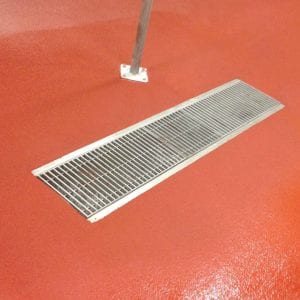
Floor Drain Detail 1

- Floor Drain detail 2
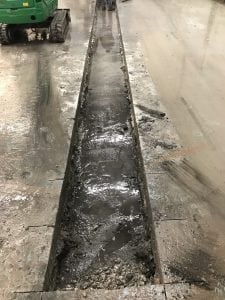
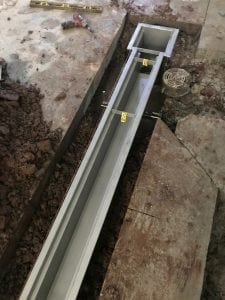
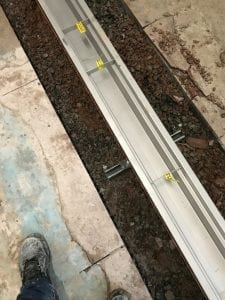
Saw cut and excavate drain areas.
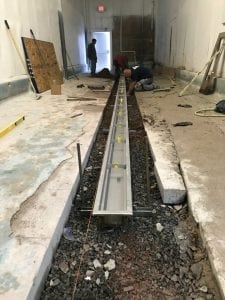
Install clamps and set drains.
Step-by-Step Floor Proper Slope For Drainage Procedures
OPTION A – NEW SLOPED UNDERLAYMENT, OVER THE EXISTING CONCRETE
NOTE: Assuming thickness of the PUMA-CRETE ® floor topping at 1/4 inch.
- Finalize the drain layout, and specify style/size/material for new drains.
- Specify new drain and cleanout elevations (these should be installed at the surface of the new underlayment. For drains, this shall be flush with the existing concrete floor. For cleanouts, the elevation shall be 3/8″ higher than the new underlayment height. The elevation will depend on the specified slope to new drains. Refer to our sloping chart, to determine the necessary grade for your application.
- Next, 2 foot wide sections of the concrete floors need to be excavated/trenched, in order to install the new drains and associated piping.
- Install the piping, drains and cleanouts.
- After this is completed, double check the drain and cleanout height (see instruction #2), and ensure the tops are set level.
- When backfilling the trenches with concrete, re-fill the trenches to 1-2 inches below existing concrete, with a ROUGH finish (this will be covered with new toppings).
OPTION B – EXISTING CONCRETE (no sloped underlayment), or POURING A NEW SLAB
- Finalize the drain layout, and specify style/size/material for new drains.
- Specify new drain elevations. For drains, the top of drain shall be slightly less than the existing concrete floor, and should allow for 1/4 inch per foot slope around the new drain. If you specify the new drains to be 1/2″ below the existing concrete, this will provide good drainage, so that it is “dished” around the new drains (without creating too much of a depression).
- For cleanouts, the top edge shall be set 1/4 inch higher than the adjacent concrete, and sloped at same rate as concrete. The cleanouts are set slightly high, to prevent water from settling on them!
- Two foot wide sections of the concrete floors need to be excavated/trenched, in order to install the new drains and associated piping.
- Install the clamps and set the drains.
- After this is completed, double check the drain and cleanout height (see instruction #2 and #3), and ensure they are set square and level, or if possible, on the same pitch as the new topping (1% to 2% grade).
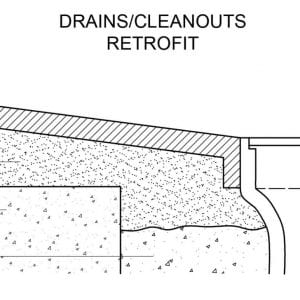
- When backfilling the trenches with concrete, re-fill the trenches so that they are flush with the existing concrete, with a light steel troweled finish. During the finish floor work, a keyway shall be installed by us, to lock in the new flooring flush with the drains. (see figure below).
Check out the advantages we offer, over our competition !
Top 10 Puma-Crete® Advantages
Food & Beverage Processing Floors – home
PUMA-CRETE FLOOR OPTIONS
Sloping to Drains
Trench Drain Installation
Sanitary Cove Base
Installing over brick or tile
Cleaning Puma-Crete®
For more information on our Puma-Crete® flooring, please contact a project consultant, for further information at 1-800-808-7773